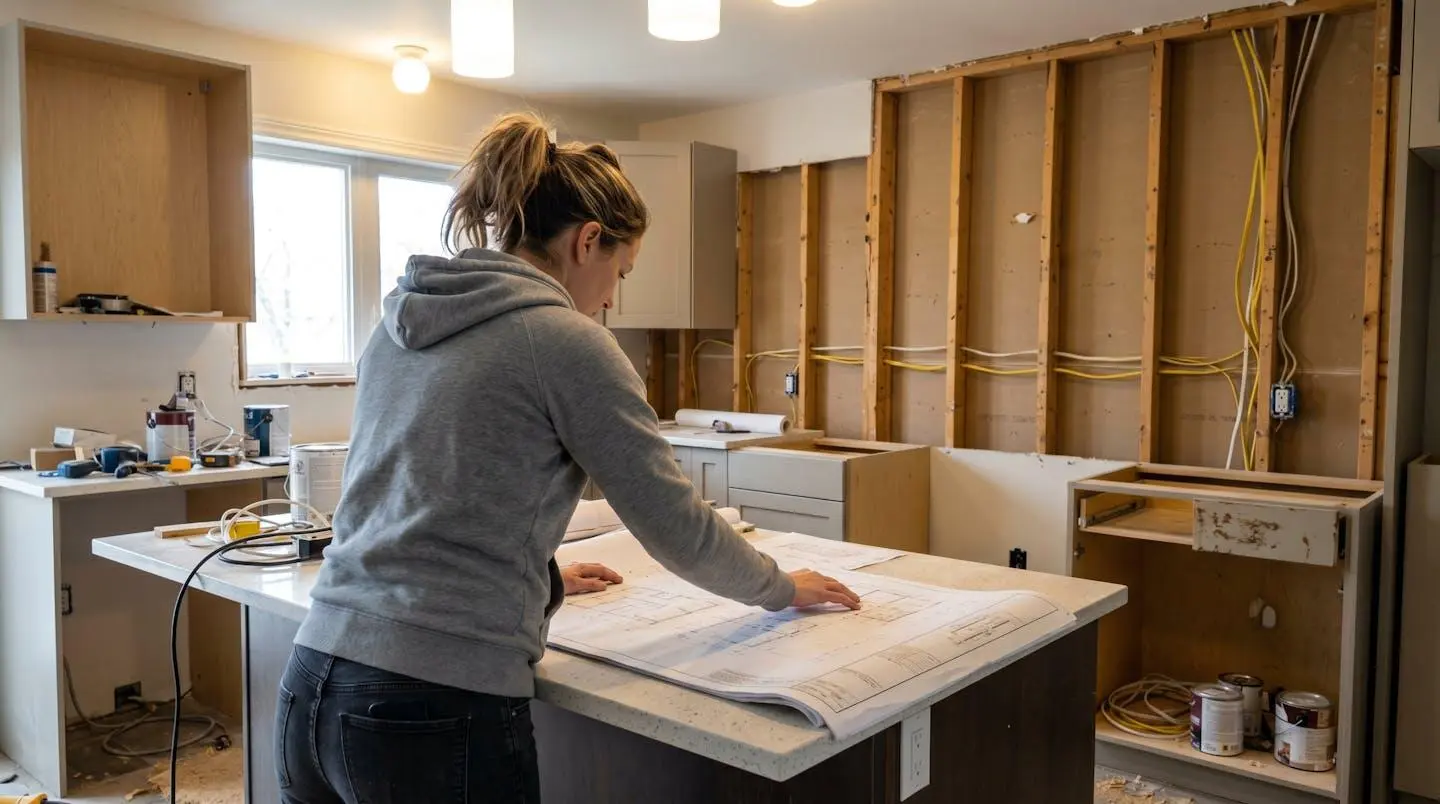
Renovation planning often begins with paint swatches and cabinet styles. Then demolition starts, and a contractor discovers the main drainage stack runs exactly where your island was supposed to go. According to the Q2 2025 Residential Renovation Price Index tracked by Statistics Canada, residential renovation costs climbed 0.9% nationally in the second quarter alone, driven partly by tariffs on steel and aluminum but also by the recurring reality that infrastructure upgrades weren’t in the original estimate. The systems concealed behind your walls—plumbing networks, load-bearing structures, electrical panels, and HVAC ductwork—dictate what’s actually possible when you want to knock down walls and reconfigure space. These aren’t minor details you address mid-project. They’re the foundation of realistic budgeting and design that actually works.
Most homeowners planning a remodel focus first on the visible upgrades: countertops, flooring, lighting, or new cabinetry. However, the hidden infrastructure behind walls and under floors often determines whether a project stays within budget. A successful home renovation depends just as much on plumbing capacity, electrical systems, and structural constraints as it does on design choices. Without an early technical assessment, costly surprises can emerge during demolition, such as extensive plumbing rerouting or the need for a major electrical service upgrade to support modern appliances.
Understanding these four hidden systems before finalizing design plans separates realistic budgets from wishful thinking. Each system operates under strict code requirements and physical constraints that cannot be ignored or deferred. The following sections break down how plumbing networks, load-bearing structures, electrical capacity, and HVAC ductwork shape—and sometimes limit—your renovation possibilities.
Plumbing networks: why your dream island might cost $12,000 more
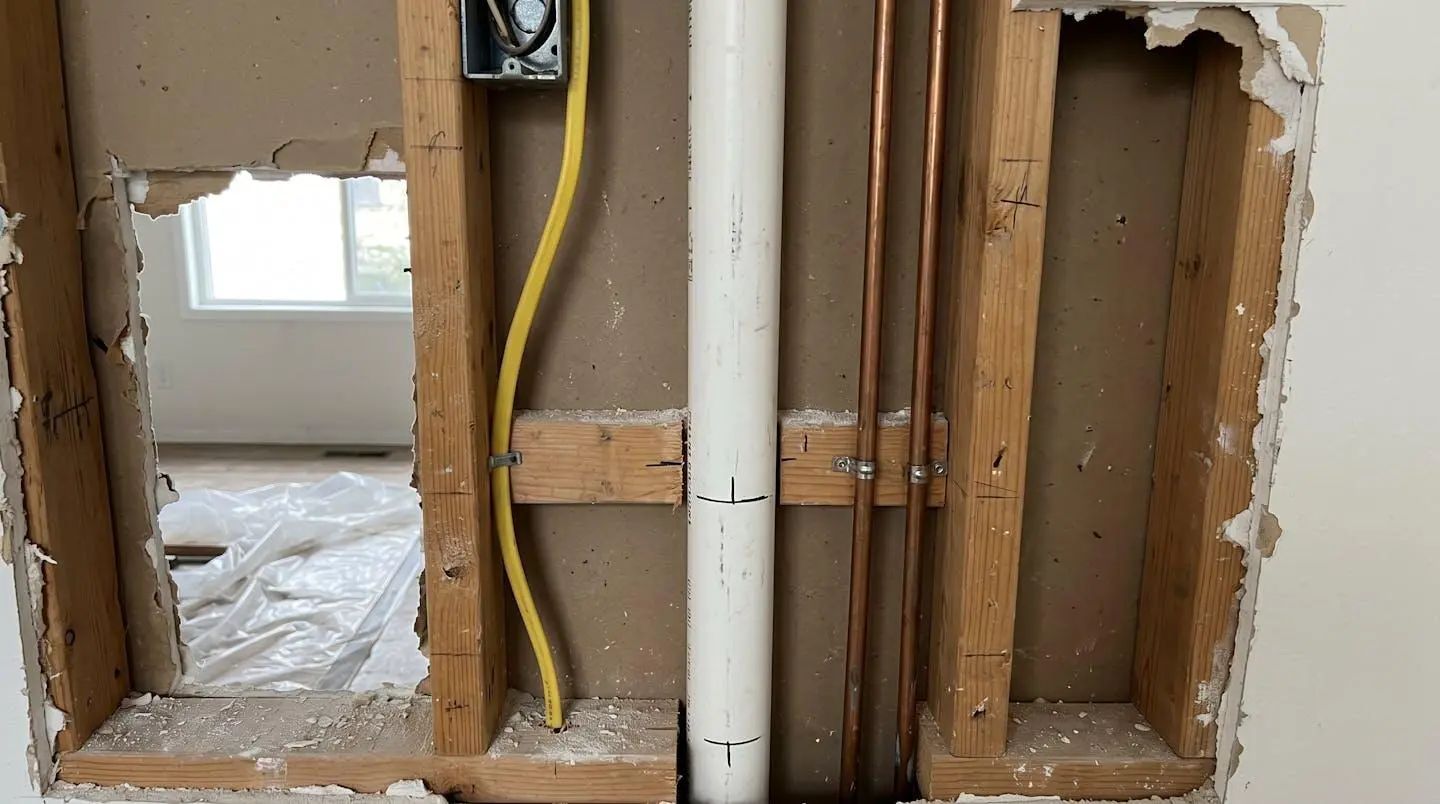
Picture a typical kitchen renovation in a 1980s bungalow. The homeowners want an open-concept layout with a large island featuring a prep sink. Design looks perfect on paper. Then the plumber arrives during the planning phase and points to a vertical pipe chase running through the exact spot where the island was drawn. That’s the main drainage stack—a 3-inch or 4-inch vertical pipe that carries wastewater from upper floors down through the foundation. Moving it isn’t a matter of rerouting a single pipe. It requires reworking drainage lines on every floor the stack serves, reconfiguring venting to meet code, and often opening walls in rooms above or below the kitchen. The cost for this single infrastructure change typically lands between $8,500 and $12,000 in Southwestern Ontario, depending on how many floors the stack serves and what structural elements it’s embedded in. An upfront plumbing consultation during design prevents discovering mid-construction that your desired layout requires extensive rework.
Drainage systems follow rigid physics and code requirements. Every fixture needs venting to prevent siphoning trap water and allowing sewer gases into living spaces. Venting regulations as detailed in the 2025 National Model Codes technical change summary from the CBHCC specify maximum distances from traps to vents and slope requirements. Relocating kitchens or bathrooms means navigating drainage slopes, vent routing, and code clearances—bathrooms face even tighter constraints because toilets often cannot move more than a few feet from existing stacks without major rework.
Smart renovation planning addresses plumbing infrastructure before finalizing floor plans. Comprehensive renovation planning that accounts for plumbing infrastructure involves having a licensed plumber assess existing drainage and venting during the design phase, not after cabinets are ordered. This upfront consultation can prevent discovering mid-construction that your desired layout requires extensive plumbing rework. Alternative strategies include designing the island without plumbing (a dry island with storage and seating only), using air admittance valves where code permits to reduce venting complexity, or accepting a slightly adjusted layout that works with the existing stack location. The constraint isn’t a flaw in your vision—it’s the reality of how drainage physics and building codes govern where water can flow.
Code checkpoint: Ontario plumbing regulations require drainage stacks to maintain minimum diameters (typically 3 inches for main stacks serving multiple fixtures) and specific vent configurations. Reducing stack diameter or eliminating required vents isn’t negotiable—inspectors will flag it, and you’ll be reworking plumbing before occupancy approval.
Load-bearing structures: the invisible boundary of your open concept
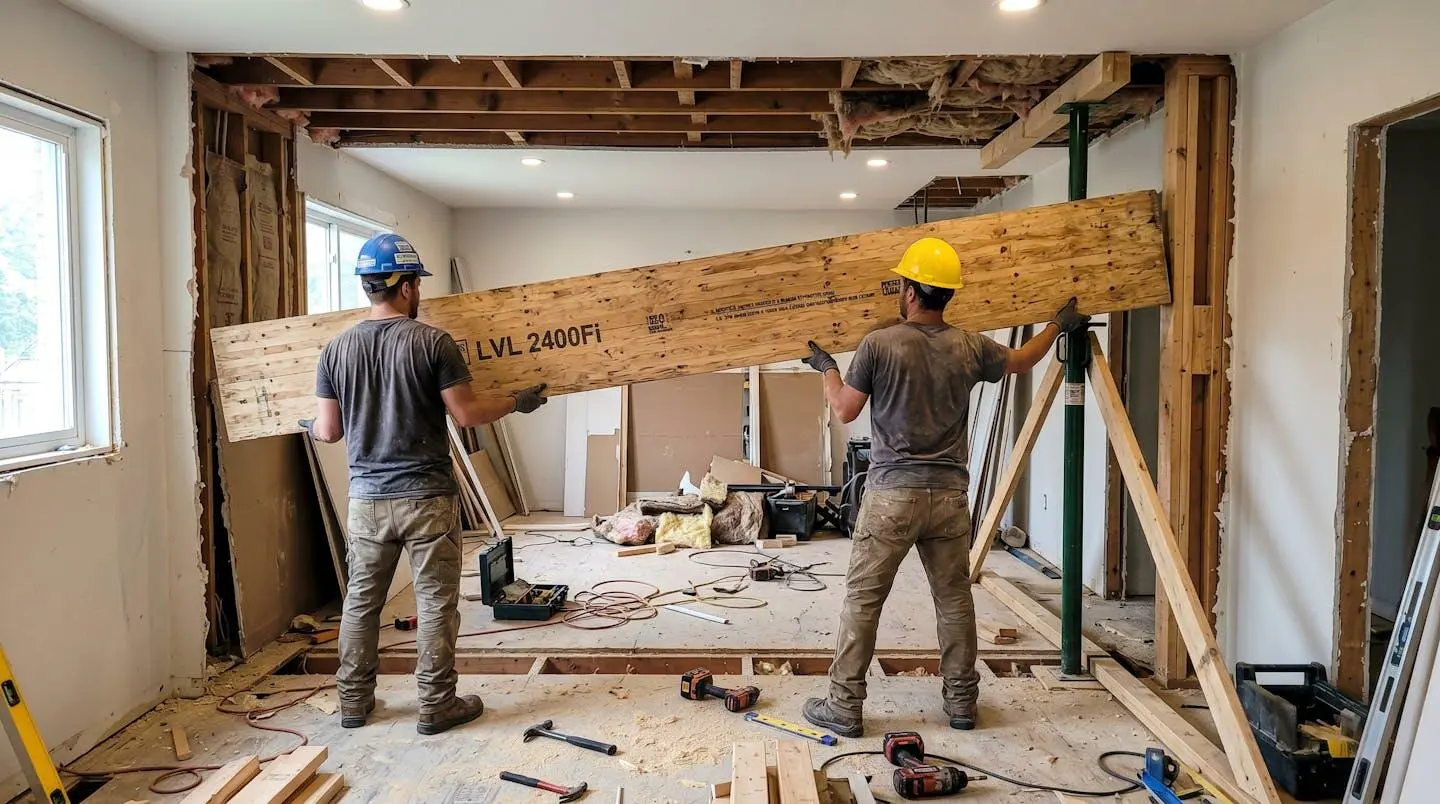
HGTV makes wall removal look like an afternoon project with sledgehammers and drama. Reality is more complicated. Some walls support structural loads—upper floors, roof trusses, or the building itself—and removing them without proper engineering creates catastrophic collapse risk. Other walls are simply partitions with no structural role. The difference isn’t always visually obvious, and guessing is dangerous—a seemingly non-structural wall might carry point loads or provide critical lateral bracing.
Removing a load-bearing wall requires installing a beam (typically engineered lumber like laminated veneer lumber or glulam) to carry the load across the new opening. This beam needs to transfer its load to adequate bearing points on either end—often requiring new posts or columns extending down to the foundation. A structural engineer calculates the required beam size based on span width, loads above, and building code safety factors outlined in the alteration requirements set out in the National Building Code of Canada 2025. For a typical 12-to-16-foot opening in a single-story home, expect engineered beam installation to cost between $3,500 and $8,000, including engineering fees (around $800-$1,500), materials, and labor. Wider spans or two-story loads push costs significantly higher. Multi-story homes often require steel beams instead of engineered lumber, adding weight (and cost for specialized installation) but allowing longer spans with less depth.
Beam depth matters more than homeowners expect. A 12-inch-deep beam eats 12 inches of ceiling height at the point where the wall was removed. If your existing ceiling is 8 feet tall, dropping to 7 feet at the beam location creates a visual bulkhead and can feel claustrophobic. Solutions include raising ceiling joists (expensive and complex), accepting the bulkhead as an architectural feature (less expensive, still functional), or designing the space to minimize the visual impact through lighting and finish choices. Structural engineers can sometimes reduce beam depth by using stronger materials or adding intermediate support posts, but physics imposes limits. Some open-concept dreams run into the reality that the beam required would be so deep or require so many support columns that the “open” concept becomes cluttered with structural elements.
Permit reality: Removing load-bearing walls without a building permit and structural engineering assessment violates building codes in every Ontario municipality. Inspectors can (and do) require homeowners to expose walls, verify engineering, and retrofit proper support—even years after unpermitted work. The financial and safety risks aren’t theoretical.
Electrical capacity: when your panel says ‘no’ to your renovation
A family planning a modest renovation—adding a bathroom and home office—discovered their 100-amp service was already at 85% capacity. Adding new circuits would exceed safe limits. The renovation required upgrading to 200 amps—a project needing a new panel, service cables, utility coordination, and Electrical Safety Authority inspection. Cost: $2,000 to $4,500. None of this was budgeted because the homeowners assumed their system could accommodate extra outlets.
Older homes (particularly those built before 1990) commonly have 100-amp or even 60-amp electrical service, designed for the electrical loads of that era: incandescent lighting, electric ranges, maybe a window air conditioner. Modern homes routinely pull far more power: LED lighting is more efficient, but homes now have multiple HVAC zones, electric vehicle chargers, induction cooktops, tankless water heaters, home offices with multiple computers and monitors, whole-home humidifiers, and high-powered bathroom exhaust fans with integrated heaters. The cumulative load can easily exceed what older panels were designed to handle. Electricians calculate total connected load and apply demand factors from the Canadian Electrical Code to determine if your panel has headroom for additional circuits. If it doesn’t, renovation plans need to change—either by reducing electrical loads (using gas appliances instead of electric, for example) or upgrading the service.

0.9%
National increase in residential renovation costs during Q2 2025
Panel upgrades affect renovation timelines because they require coordination with your local utility company (which must upgrade the service connection from the street or transformer) and scheduling ESA inspections. Permitting and utility scheduling can add 2-4 weeks to your renovation timeline, sometimes longer in busy construction seasons. Discovering this need mid-renovation—after you’ve already torn out walls and ordered materials—creates expensive delays. The preventive approach involves having an electrician assess panel capacity during initial planning, calculating anticipated new loads, and flagging service upgrades before you commit to timelines with other trades.
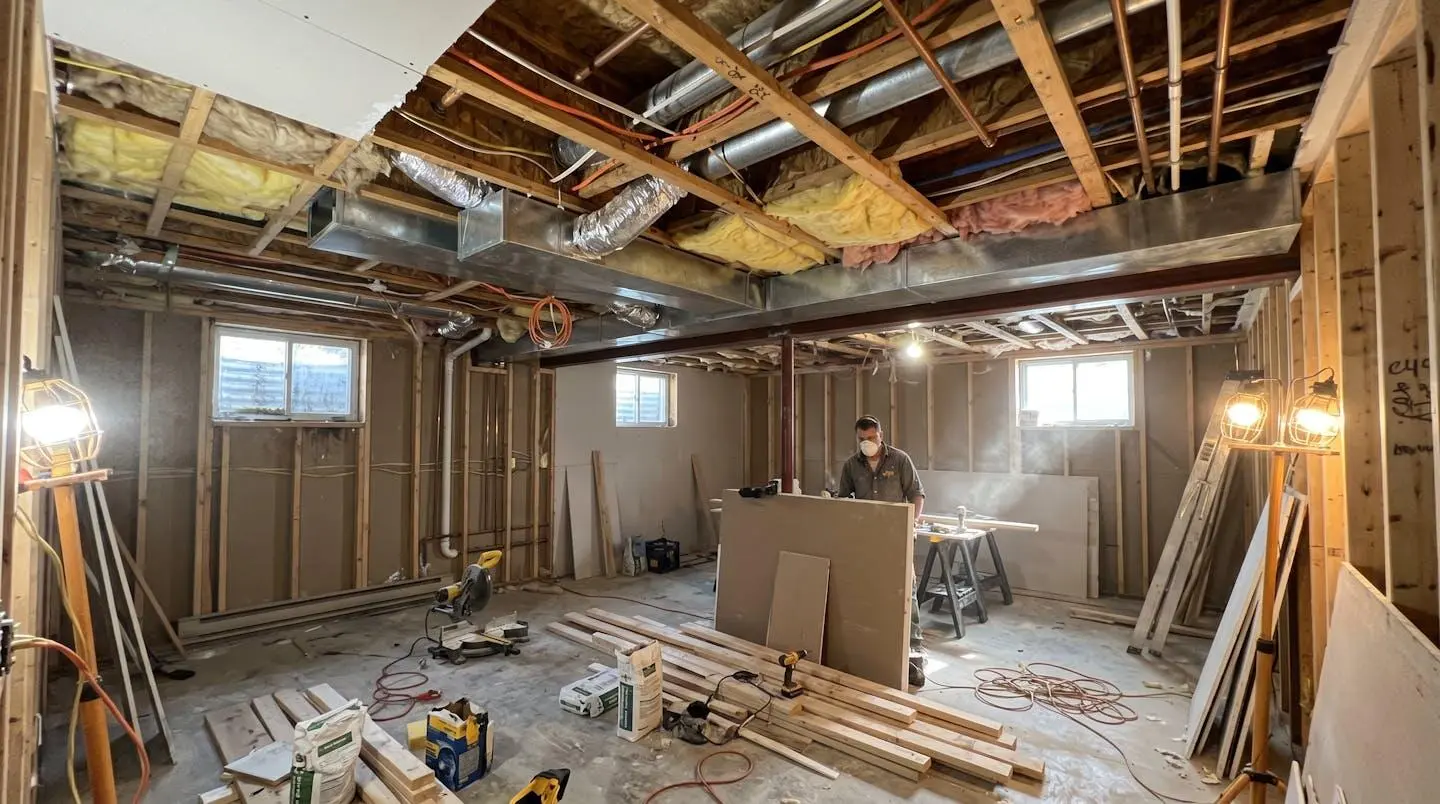
HVAC ductwork: the space thief hiding in your ceiling
Forced-air HVAC systems distribute conditioned air through sheet metal ductwork running between floor joists, through wall cavities, and across attics. This ductwork occupies significant three-dimensional space, and it’s not easily moved. When homeowners want to raise a basement ceiling to meet code-minimum ceiling heights (often 7 feet for habitable space), the ductwork becomes the limiting factor. Standard residential duct runs are typically 6 to 8 inches in diameter (or rectangular equivalents), plus clearance for insulation wrapping. Rerouting ducts to run along walls instead of through ceiling joists, or redesigning the entire duct layout to accommodate new room configurations, costs between $4,000 and $9,000 depending on system complexity, accessibility, and whether balancing the airflow requires resizing ducts or adding new dampers.
Open-concept renovations create HVAC challenges beyond just duct routing. Removing walls that previously separated rooms eliminates natural air circulation boundaries. A kitchen that was previously a separate enclosed space now shares air with the living and dining areas, meaning cooking odors, heat from the range, and humidity all circulate more freely. HVAC systems designed for compartmentalized layouts may struggle to maintain comfortable temperatures and air quality in the newly open space. Zoned systems (with separate thermostats for different areas) become more valuable but require additional ductwork, dampers, and sometimes supplementary equipment like mini-split heat pumps to maintain comfort in specific areas without overcooling or overheating adjacent spaces.
Alternative HVAC strategies can avoid ductwork constraints entirely. Ductless mini-split heat pumps mount on walls or ceilings and require only small refrigerant lines (typically 3 inches in diameter) running to an outdoor compressor unit. They’re ideal for additions, basement conversions, or spaces where ductwork routing is impractical. Modern mini-splits provide both heating and cooling with high efficiency, and installation costs ($2,500-$5,000 per indoor unit) often compare favorably to extensive duct rerouting. The trade-off is aesthetic: wall-mounted units are visible (though sleeker than older models) and require dedicated electrical circuits. For homeowners prioritizing clean sightlines and minimal ceiling intrusion, mini-splits eliminate the spatial conflict between HVAC infrastructure and architectural goals.
- Schedule a plumber to map drainage stack locations and assess venting requirements before finalizing floor plans
- Hire a structural engineer to identify load-bearing walls and provide beam specifications if walls will be removed
- Have an electrician calculate existing panel capacity and identify whether service upgrades are needed for planned circuits
- Request HVAC contractor assessment of ductwork routing constraints and airflow implications for open-concept layouts
- Confirm all planned structural, electrical, and plumbing work complies with Ontario Building Code and obtain required permits before demolition
- Budget for infrastructure upgrades as contingency line items
Infrastructure planning isn’t the exciting part of renovation—choosing finishes and visualizing the finished space is far more enjoyable. But the four systems hiding behind your walls—plumbing stacks, load-bearing structures, electrical panels, and HVAC ductwork—collectively determine whether your design vision is achievable within your budget and timeline. These aren’t obstacles to resent—they’re the engineering realities that separate Pinterest inspiration from buildable plans.
The homeowners who avoid mid-renovation budget shocks are the ones who involve specialized trades during the design phase, not after demolition starts. A few hundred dollars spent on upfront assessments prevents discovering five-figure infrastructure upgrades when it’s too late to adjust plans. What’s your current floor plan hiding that might reshape your renovation budget?